Introduction
Welcome to your journey in yoga toward a calmer mind and a more flexible body. The fact that you are reading this means you have already taken the most important step: deciding to show up for yourself. This guide is designed to remove the guesswork and intimidation often associated with yoga, offering a simple, accessible flow that fits into the busiest of schedules.
Benefits of a Daily Home Practice
Committing to even a short daily yoga practice can yield profound changes that go far beyond the physical. You don’t need to practice for an hour to see results in yoga at 15 minutes of consistent, mindful movement can transform your day-to-day life.
- Increases Flexibility & Mobility: Daily gentle stretching loosens tight muscles, improves your range of motion, and can alleviate stiffness caused by sitting at a desk all day.
- Reduces Stress & Anxiety: By connecting your breath with movement, you activate the parasympathetic nervous system (your “rest and digest” mode), lowering cortisol levels and quieting the mental chatter.
- Builds Consistency: A home practice removes the barriers of travel time and studio schedules in yoga making it easier to build a sustainable, long-term habit.
- Deepens Self-Awareness: Practicing alone allows you to tune in to your own body without comparing yourself to others. You learn to listen to what you need on any given day.
How to Use This Guide
This guide is structured as a gentle, step-by-step journey.
- Follow the Order: The poses are sequenced intentionally to warm up the body, build heat, and then cool down. For the best experience, follow them in the order presented.
- Prioritize Breath: The instructions for each pose will include breath cues. Your breath is the most important part of the practice. If your mind wanders, gently bring it back to the sensation of inhaling and exhaling.
- Listen to Your Body: This is your practice in yoga. Never force yourself into a pose. If something feels painful (a sharp, stabbing sensation), ease out of it immediately. If it just feels intense (a dull, stretching sensation), breathe into it.
Tips for Creating a Peaceful Space
You don’t need a dedicated yoga room to have a transformative practice. You just need a small area where you feel comfortable.
- Find Your Spot: Choose a corner of your bedroom or living room where you have just enough space to stretch your arms out wide and lie down.
- Set the Mood (Optional but nice): Lower the lights, light a candle, or open the blinds to let in natural light. These small cues tell your brain it’s time to slow down.
- Minimize Distractions: Put your phone on “Do Not Disturb” and, if possible, let others in your home know you need 15 minutes of quiet time.
- Keep It Simple: All you truly need is a little bit of floor space.
Part 1: Preparing for Your Practic
Before you move into the first pose in yoga, taking a few minutes to prepare your space and your mind will make your practice safer and more enjoyable.
What You’ll Need (Comfortable clothes, mat, optional props)
One of the best things about yoga is that you can start right now with what you have.
- Clothing: Wear clothes that allow you to move freely. This could be leggings, shorts, sweatpants, or a t-shirt. There’s no need for special “yoga wear.”
- Yoga Mat: A mat is highly recommended to provide cushioning and prevent your hands and feet from slipping. If you don’t have one, a carpeted floor is fine for now.
- Optional Props: Props are tools to help you find comfort and stability. Do not see them as a crutch, but as an aid.
- Cushion or Blanket: Great for sitting on if your hips are tight, or for extra padding under your knees.
- Belt or Scarf: If you can’t reach your toes in a seated stretch, loop a belt around your feet and hold the ends.
- Water: Have a water bottle nearby to sip if you get thirsty, especially between standing poses.
The 3-Minute Centering: Breath Awareness
Before you move your body, you must connect to your breath. This short practice transitions you from the “doing” mode of your day to the “being” mode of your yoga practice.
- Get Comfortable: Find a comfortable seated position on your mat. You can sit cross-legged (Sukhasana) or, if that is uncomfortable on your knees, kneel or even lie down on your back. Place your hands gently on your thighs.
- Lengthen Your Spine: Imagine a string pulling you up from the crown of your head. Lengthen through your back, but keep your shoulders soft and relaxed, away from your ears.
- Close Your Eyes: Gently close your eyes and bring your awareness inward. Let your jaw relax. Let your tongue rest at the roof of your mouth or on the floor of your mouth.
- Observe the Natural Breath: Don’t try to change your breathing yet. Simply notice it. Is it shallow or deep? Fast or slow? Just watch the natural rhythm of your inhale and exhale.
- Deepen the Breath (After 1 minute): Begin to deepen your breath. Inhale slowly through your nose, feeling your belly and ribs expand. Exhale slowly through your nose, feeling your navel draw back toward your spine.
- Set an Intention (Optional): On your final few breaths here, think of one word to guide your practice. It could be “peace,” “patience,” “strength,” or simply “ease.” When your mind wanders during the poses, you can return to this word.
When you feel present and centered, you are ready to gently open your eyes and begin the flow in yoga.
Part 2: The 15-Minute Daily Flow
This is the heart of your practice in yoga. Move through these poses slowly and deliberately, linking each movement with your breath. There is no rush. The goal is not to get to the end, but to feel each moment fully.
Section A: Warm-Up & Grounding
This section prepares your body for movement in yoga. We will wake up the spine, mobilize the joints, and bring blood flow to the major muscle groups.
Child’s Pose (Balasana)
The ultimate resting pose. Use it to tune inwards and connect with your breath.
- How to get into the pose:
- From your hands and knees, bring your big toes together and sit your hips back toward your heels.
- Widen your knees as wide as your mat, allowing your belly to sink down between your thighs.
- Walk your hands forward to the top of the mat, lowering your forehead to the floor (or to a block/blanket).
- Alignment Tips:
- Keep your arms long and active, pressing your palms firmly into the mat.
- Relax your shoulders away from your ears.
- If your forehead doesn’t reach the floor, rest it on stacked fists or a cushion.
- Breath Cue: Stay here for 5 deep breaths. With every inhale, feel your spine lengthen. With every exhale, feel your hips sink back and your body soften.
Cat-Cow Stretch (Marjaryasana to Bitilasana)
Warms up the spine and relieves tension in the back and neck.
- How to get into the pose:
- From Child’s Pose, come up onto your hands and knees in a “tabletop” position. Place your wrists directly under your shoulders and your knees directly under your hips. Keep your back flat like a table.
- Inhale (Cow Pose): Drop your belly toward the mat. Lift your chin and chest, and gaze gently up toward the ceiling. Allow your sitting bones to point up.
- Exhale (Cat Pose): Round your spine toward the ceiling like a Halloween cat. Tuck your chin into your chest and draw your navel up toward your spine. Feel a lovely stretch across your upper back.
- Alignment Tips:
- Keep the movement slow and controlled, initiated by your breath.
- Press evenly through your palms, spreading your fingers wide.
- Breath Cue: Continue for 5-8 rounds, moving with your breath. Inhale to arch, exhale to round during yoga.
Downward-Facing Dog (Adho Mukha Svanasana)
A foundational pose that stretches the entire back body, strengthens the arms, and energizes you.
- How to get into the pose:
- From your final Cat Pose (spine rounded), tuck your toes under, lift your hips up and back, and straighten your legs as much as feels comfortable.
- Form an inverted “V” shape with your body.
- Alignment Tips:
- Pedal it out: It’s okay to “walk the dog” by gently bending one knee and then the other to stretch the calves.
- Keep your arms straight but not locked. Spin your inner elbows slightly forward.
- Let your head hang heavy, with your gaze between your ankles or toward your belly button.
- If your hamstrings are tight, keep a generous bend in your knees to lengthen your spine. The goal is a long back, not straight legs.
- Breath Cue: Hold for 5 deep breaths. On your inhales, feel your chest open. On your exhales, press your thighs back and your heels gently toward the floor.
Section B: Standing Poses (Building Heat & Strength)
Now that you are warm, we will come up to standing to build heat, strength, and focus. These poses will challenge your balance and stamina during yoga.
Mountain Pose (Tadasana)
The blueprint for all standing poses. It looks simple, but it is an active pose that teaches proper alignment and groundedness.
- How to get into the pose:
- From Downward Dog, walk or lightly jump your feet forward to the top of your mat. Come to stand with your feet together (or hip-width apart for more stability).
- Stand tall, like a mountain.
- Alignment Tips (The Stack):
- Feet: Press down evenly through all four corners of both feet (big toe mound, little toe mound, inner heel, outer heel).
- Legs: Engage your thigh muscles, lifting your kneecaps.
- Hips/Pelvis: Keep your pelvis neutral—not tucked under (posterior tilt) or arched forward (anterior tilt).
- Torso: Lengthen your spine. Draw your lower belly in slightly.
- Shoulders: Roll them up, back, and down, letting your arms hang naturally alongside your body with palms facing forward.
- Head: Balance your head directly over your pelvis, with your gaze soft and straight ahead.
- Breath Cue: Take 3 deep breaths here. Feel the strength of your foundation. On an inhale, imagine a string pulling you taller. On an exhale, root down through your feet.
Forward Fold (Uttanasana)
Releases the hamstrings and lower back in yoga. Allows the head to hang below the heart, which is calming for the nervous system.
- How to get into the pose:
- From Mountain Pose, inhale and sweep your arms up overhead.
- Exhale and hinge forward from your hip joints (not your waist), folding your torso over your thighs. Keep your spine as long as possible as you fold.
- Alignment Tips:
- Bring your fingertips to the floor next to your toes. If they don’t reach, place them on blocks or hold onto your shins.
- Bend your knees generously! This is the secret to a happy lower back. You can aim to straighten your legs over time, but never at the expense of a rounded spine.
- Let your head hang heavy, relaxing your neck.
- Breath Cue: Stay for 3 breaths. With each inhale, feel a slight lift and lengthening in your chest. With each exhale, soften deeper into the fold.
Halfway Lift (Ardha Uttanasana)
Lengthens the spine and prepares the body for the transition back or into a lunge.
- How to get into the pose:
- From your Forward Fold, place your fingertips on the floor or on your shins.
- On an inhale, press through your fingertips, engage your core, and lift your chest halfway up, creating a flat back. Your spine should be parallel to the floor.
- Alignment Tips:
- Keep your shoulders back and down, away from your ears.
- Engage your thighs to support the position.
- Gaze forward, keeping your neck long.
- Breath Cue: Hold for one full inhale and exhale. On the exhale, you will either fold forward again or step back.
Low Lunge (Anjaneyasana)
A powerful hip opener that builds strength and stability in the legs.
- How to get into the pose:
- From your Forward Fold (or Halfway Lift), exhale and step your right foot far back. Lower your right knee to the mat.
- Your left knee should be stacked directly over your left ankle, forming a 90-degree angle.
- Inhale and lift your torso upright. You can keep your hands on your left thigh, or for more challenge, sweep your arms up overhead.
- Alignment Tips:
- Tuck your back toes under, or keep the top of the foot flat on the mat.
- Press your right shin and knee firmly into the floor.
- Keep your hips squared toward the front of your mat. Imagine your two hip points are headlights shining forward.
- If you feel unstable, keep your hands on your thigh. If your back knee is sensitive, pad it with a blanket.
- Breath Cue: Hold for 3 breaths. On an inhale, lift your heart and maybe your arms. On an exhale, sink your hips a little lower.
Pyramid Pose (Parsvottanasna)
A deep stretch for the hamstrings and a test of balance in yoga.
- How to get into the pose:
- From Low Lunge, lower your hands to the mat, step your back foot forward to meet your front foot, and step your feet apart again (hip-width distance).
- Pivot on your back foot so your toes point slightly out. Your feet should be about 3 feet apart.
- Square your hips to the front of the mat. (This is the hard part! It’s okay if they aren’t perfectly square).
- Inhale to lift your chest. Exhale to fold forward over your front leg, keeping your spine long.
- Alignment Tips:
- This is a hip fold, not a back fold. Hinge from the hips.
- You can place your hands on blocks on either side of your front foot, or interlace your thumbs and reach your arms forward like a dolphin.
- Keep a micro-bend in your front knee to protect the hamstring.
- Breath Cue: Stay for 3-5 breaths. With each exhale, try to release a little more tension in the front leg and fold a little deeper.
- Repeat on the Left Side: Before moving on, remember to step back into Low Lunge and then Pyramid Pose with your left foot forward.
Section C: Core & Balance
After opening the hips and stretching the legs, we will build a little heat and strength in the core. A strong core supports your lower back and improves balance in all areas of life.
Plank Pose (Phalakasana)
This pose builds strength in the arms, wrists, and core. It’s like a push-up hold, teaching you to engage your entire body.
- How to get into the pose:
- From your final Pyramid Pose on the second side, place your hands flat on the mat shoulder-width apart.
- Step or lightly hop one foot at a time back into a high push-up position. Your body should form one straight line from the crown of your head to your heels.
- Alignment Tips:
- Hands: Spread your fingers wide and press firmly into the mat. The space between your index fingers and thumbs should point forward.
- Shoulders: Stack them directly over your wrists. Do not let them sink down toward the mat or hunch up by your ears.
- Core: Draw your navel in toward your spine. Imagine you are bracing to be gently punched in the belly. This prevents your hips from sagging.
- Legs: Engage your thighs and press your heels back toward an imaginary wall behind you.
- Modification: If this is too intense, you can lower your knees to the mat. Keep your body in a straight line from your knees to the crown of your head.
- Breath Cue: Hold for 3-5 deep breaths. It’s common to want to hold your breath in core work, but try to keep the breath steady and calm. Inhale to find length, exhale to engage the core deeper.
Baby Cobra or Low Cobra (Bhujangasana)
A gentle backbend that strengthens the spine and opens the chest, counteracting the effects of sitting and hunching forward.
- How to get into the pose:
- From Plank Pose, gently lower your knees, chest, and chin to the mat (or lower all the way down onto your belly in one smooth motion).
- Lie on your belly with your legs hip-width apart and the tops of your feet pressing into the mat.
- Place your hands on the mat directly under your shoulders, with your elbows hugged in close to your sides.
- On an inhale, press through your hands and lift your chest a few inches off the mat. Keep your lower ribs on the floor. This is Low Cobra.
- (Optional: For Baby Cobra, you barely use your arms. Simply engage your back muscles to lift your heart, hovering your hands an inch off the floor.)
- Alignment Tips:
- The most important rule: Do not push so high that you dump all the pressure into your lower back. The lift should come from the strength of your upper back muscles pulling your shoulder blades together and down.
- Keep a slight micro-bend in your elbows.
- Broaden across your collarbones and keep your gaze low on the floor (or slightly forward), keeping your neck long.
- Breath Cue: Hold for 3 breaths. Inhale to lift and lengthen the spine. Exhale to release a little tension. On your final exhale, slowly lower your chest back to the mat.
Section D: Seated & Hip Openers
We will now transition to a seated position to cool the body down. These poses target the hips, hamstrings, and lower back—areas where we hold a lot of tension.
Staff Pose (Dandasana)
The seated equivalent of Mountain Pose in yoga. It resets the alignment and prepares the body for seated forward folds.
- How to get into the pose:
- From your belly, press yourself up, swing your legs around, and sit up tall with your legs extended straight out in front of you.
- Alignment Tips:
- Legs: Press your thighs down into the mat. Flex your feet, engaging your quadriceps.
- Sit Bones: Rock side to side slightly to feel your “sit bones” (the bony parts of your pelvis) rooting down into the mat.
- Spine: Stack your ribs directly over your pelvis. Lengthen your spine tall.
- Hands: Place your palms flat on the mat beside your hips, fingers pointing forward or slightly out to the sides.
- Modification: If your back rounds and you can’t sit up straight, sit on a folded blanket or cushion. This lifts the hips and allows the pelvis to tilt forward naturally.
- Breath Cue: Take 3 full breaths here. With every inhale, grow a little taller through the crown of your head. With every exhale, root down through your sit bones.
Seated Forward Fold (Paschimottanasana)
An intense, yet calming stretch for the entire back of the body—the spine, hamstrings, and calves n yoga.
- How to get into the pose:
- From Staff Pose, inhale and reach your arms up overhead, lengthening your spine.
- Exhale and hinge forward from your hip joints, reaching for your feet, shins, or ankles. Imagine your belly coming to rest on your thighs.
- Alignment Tips:
- Lead with your heart: As you fold, think of leading with your chest, not the top of your head. Keep your spine as long as possible.
- Hold your feet: You can hold your big toes with a “peace sign” grip (forefinger and middle finger around the toe), or loop a strap around the balls of your feet.
- Keep the feet flexed: This engages the legs and deepens the hamstring stretch.
- Bend your knees: It is perfectly okay to keep a generous bend in your knees. Straight legs are a distant second priority to a long, comfortable spine.
- Breath Cue: Stay for 5 deep breaths. With each inhale, feel a slight lift and lengthening through your spine. With each exhale, release a little deeper into the fold, surrendering to gravity.
Happy Baby Pose (Ananda Balasana)
A playful and deeply relaxing hip opener. It releases the lower back and inner groins.
- How to get into the pose:
- From Seated Forward Fold, gently lie onto your back.
- On an exhale, draw both knees into your chest.
- Then, separate your knees wide, bringing them up toward your armpits. Flex your feet so the soles of your feet face the ceiling.
- Reach up and grab the outside edges of your feet with your hands.
- Alignment Tips:
- Gently rock side to side. This massages the spine.
- Keep your tailbone long and heavy on the mat. Try to press your sacrum down.
- If you can’t reach your feet, hold onto your shins or the backs of your thighs.
- Keep your shoulders relaxed down toward the mat. Don’t let them lift up toward your ears.
- Breath Cue: Stay for 5-7 deep breaths. With each exhale, imagine drawing your knees down a little closer to the floor beside you.
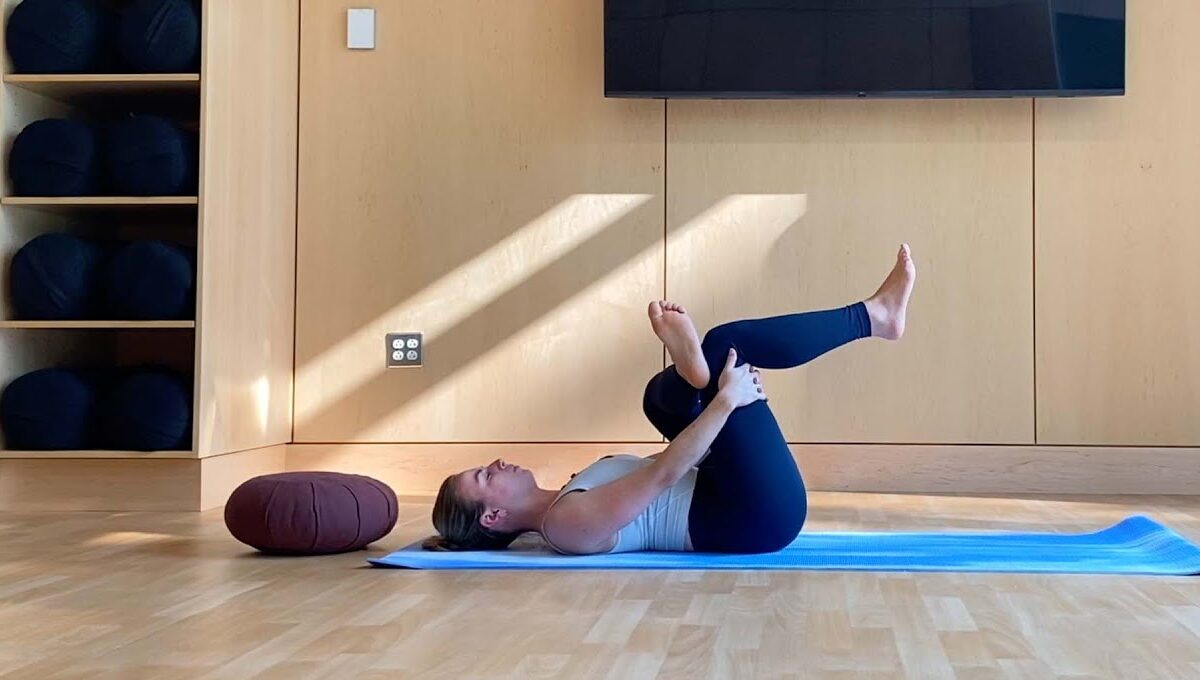
Supine Spinal Twist (Supta Matsyendrasana)
A wonderful way to release tension in the spine and lower back. It’s the perfect pose to “ring out” the spine after a practice in yoga.
- How to get into the pose:
- From Happy Baby, release your legs and lie flat on your back.
- Hug your right knee into your chest.
- Then, guide your right knee across your body toward the left side. Extend your right arm out to the right, forming a “T” with your body.
- Turn your head to gaze softly toward your right fingertips (or in the opposite direction, whichever feels better for your neck).
- Alignment Tips:
- For a gentler twist, keep your left leg straight. For a deeper twist, you can bend your left knee and place your left foot flat on the floor.
- Use your left hand on your right knee to gently encourage the stretch. You never need to force it; let gravity do the work.
- Keep both shoulders pinned to the mat as much as possible.
- Breath Cue: Hold for 5 breaths. With every inhale, find length in your spine. With every exhale, allow your knee to soften and drop closer to the floor.
- Repeat on the Left Side: Release back to center and repeat the twist, hugging your left knee in and guiding it across to the right.
Part 3: The Cool Down & Final Relaxation
You have moved, stretched, and strengthened your body during yoga. Now comes the most important part of the entire practice: the integration. This is where your body assimilates the benefits of the previous poses and your nervous system switches fully into rest mode.
. Corpse Pose (Savasana) – The most important pose
At first glance, it looks like you’re just lying there. But Savasana is a conscious practice of letting go. It teaches the art of relaxation and allows the body to absorb the benefits of your flow.
- How to get into the pose:
- From your final Spinal Twist, gently roll onto your back and extend your legs along the mat.
- Allow your feet to flop open naturally to the sides.
- Place your arms alongside your body, a few inches away from your hips, with your palms facing up toward the ceiling. This subtle opening of the hands is a gesture of receptivity and release.
- Alignment Tips:
- The Setup: Take a moment to micro-adjust. Wiggle your shoulders down toward your waist to create a little space between your ears and your shoulders. Tuck your chin slightly to lengthen the back of your neck.
- The Face: Consciously soften your face. Relax your jaw, your tongue, the tiny muscles around your eyes, and your forehead. Let your eyeballs sink heavy into their sockets.
- The Body Scan: Mentally scan your body from the top of your head to the tips of your toes. If you notice any area holding tension (like your hips or your brow), imagine breathing into that space and releasing it on the exhale.
- Breath Cue: Let your breath return to its natural, effortless rhythm. There is nothing to control here. Simply observe the breath as it flows in and out of your body like waves on a shore.
- The Stay: Remain here for a minimum of 3-5 minutes. If you have more time, 10 minutes is even better. Use a timer on your phone with a soft, gentle alarm so you aren’t distracted by wondering when to come out.
Conclusion
You did it. You moved through a full practice. Whether you felt flexible or stiff, calm or fidgety, you showed up, and that is the only victory that matters.
Listening to Your Body
The instructions in this guide are a map, but your body is the territory. Some days, Downward Dog will feel amazing. Other days, your hamstrings might feel tight, and you’ll need to bend your knees. Some days, Savasana will feel blissful; other days, your mind will race. This is all normal and part of the practice.
The most important skill you can develop is discernment—the ability to distinguish between a sensation that is a “good” stretch (intense but tolerable) and a sensation that is pain (sharp, stabbing, or in a joint). Always choose the path of kindness. Back off when you need to. There is no prize for forcing yourself into a pose.
Consistency Over Intensity
A 15-minute flow done every day will transform your body and mind far more than a grueling 90-minute class you attend once a month. Think of your practice like a daily shower for your nervous system. It’s a way to wash off the stress of the day and come back to center. Some days you’ll be focused and strong; other days you’ll be distracted and tired. It’s all practice. The simple act of unrolling your mat is a commitment to your well-being.
A Quick 5-Minute Sequence for Busy Days
Life gets hectic. On days when you are truly pressed for time, or your energy is extremely low, here is a mini-flow to fall back on. It hits the major areas of the body and calms the mind in just 5 minutes.
- Minute 1: Child’s Pose (Balasana)
- Start here. Take 5 deep breaths. Focus on the sensation of your breath against the back of your ribs.
- Minute 2: Cat-Cow Stretch
- Come to your hands and knees. Move through 5 slow rounds of Cat-Cow, warming up the spine with your breath.
- Minute 3: Downward Dog to Forward Fold
- Tuck your toes and lift your hips to Downward Dog. Take 3 breaths here, pedaling out your feet.
- On an exhale, walk or lightly jump your feet to the top of your mat for a Forward Fold (Uttanasana). Bend your knees generously and let your head hang heavy for 3 breaths.
- Minute 4: Mountain Pose to Forward Fold
- Inhale, slowly roll up to Mountain Pose (Tadasana). Take one deep breath here, feeling grounded.
- Exhale, fold forward again into your Forward Fold.
- Minute 5: Supine Twist & Savasana
- Inhale, bend your knees, and carefully lower your hips to sit, then lie down on your back.
- Immediately draw your knees into your chest, then drop them both to the right for a Supine Spinal Twist. Hold for 3 breaths.
- Bring knees back to center and drop them to the left. Hold for 3 breaths.
- Roll onto your back, extend your legs, and lie in a brief Savasana for your final 30 seconds. Just breathe.
Remember: A short practice you do is infinitely better than a long practice you skip.